 +13692363966
 NEWSLETTER

Introduction
Installing solar panels is one of the most important steps in transitioning a home toward renewable energy. While solar panels themselves are relatively simple devices, a complete residential solar installation involves much more than placing panels on a roof.
A properly designed solar panel installation must consider electricity consumption, roof condition, sunlight availability, panel orientation, inverter sizing, battery storage, wiring, electrical protection, safety, monitoring, and local requirements.
When these components are correctly designed and installed, a solar energy system can provide reliable electricity for many years.
This comprehensive guide explains how solar panel installation works, what happens before installation, how panels are mounted, how the inverter and battery are connected, what homeowners should prepare, common installation mistakes, maintenance requirements, and how to get the most from a residential solar system in 2026.

What Is Solar Panel Installation?
Solar panel installation is the process of designing, mounting, connecting, commissioning, and testing a photovoltaic system so that it can safely generate electricity for a property.
A typical residential solar system may contain:
- Solar panels
- Mounting structure
- Solar cables
- DC protection
- Solar inverter
- AC protection
- Electrical distribution equipment
- Monitoring equipment
- Battery storage, if included
The exact equipment depends on the type and size of the system.
How Does a Solar Panel System Work?
The basic energy flow is:
Sunlight → Solar panels → DC electricity → Inverter → AC electricity → Home
If batteries are included:
Sunlight → Solar panels → Inverter → Home + Battery
At night:
Battery → Inverter → Home
If the battery is empty and the home is connected to the grid:
Grid → Home
This combination allows the system to manage electricity from multiple sources.
Step 1: Determine Your Electricity Consumption
Before installing solar panels, determine how much electricity your household uses.
Look at your electricity bills and identify your monthly consumption in kWh.
For a more accurate design, collect approximately 12 months of consumption data.
This helps identify:
- Average consumption
- Highest consumption
- Seasonal variations
- Changes in electricity demand
Your solar system should be designed around actual energy usage rather than guesswork.
Step 2: Calculate Your Solar Requirements
Once you know your electricity consumption, estimate how much solar capacity is required.
The calculation depends on:
- Daily electricity consumption
- Local solar resource
- Panel wattage
- Roof orientation
- Shading
- System losses
- Desired solar coverage
For example, a household using considerably more electricity will generally require more solar capacity than a household with low consumption.
Step 3: Inspect the Roof
Before mounting solar panels, the roof should be carefully inspected.
Important considerations include:
- Roof age
- Roof material
- Structural condition
- Leaks
- Available space
- Roof angle
- Orientation
- Shading
- Access
Installing solar panels on a roof that needs replacement can create unnecessary future costs.
If the roof is near the end of its useful life, repairing or replacing it before installing solar panels may be more practical.
Step 4: Evaluate Sunlight and Shading
Solar panels need sunlight.
Trees, buildings, walls, and other structures can create shadows that reduce energy production.
A proper site assessment should consider how shadows change during different times of the day.
It can also be useful to consider seasonal changes.
A roof that appears sunny during one part of the year may experience more shading during another season.
Step 5: Choose the Solar Panel Type
There are several solar panel technologies available.
Residential installations commonly use monocrystalline panels.
When comparing panels, examine:
- Power rating
- Efficiency
- Dimensions
- Warranty
- Temperature coefficient
- Degradation characteristics
- Mechanical specifications
The highest wattage panel is not automatically the best choice.
Panel dimensions must also fit the available roof space.
Step 6: Design the Panel Layout
The installer determines where the panels will be positioned.
The layout should maximize useful solar exposure while respecting:
- Roof edges
- Obstacles
- Access requirements
- Structural limitations
- Electrical requirements
- Safety clearances
A good layout can improve energy production and simplify installation.
Step 7: Select the Solar Inverter
The inverter is a critical component of the system.
It converts the DC electricity produced by solar panels into AC electricity that household appliances can use.
The inverter should be selected according to:
- Solar array size
- Panel voltage
- Panel current
- Household load
- Battery requirements
- Backup requirements
- MPPT configuration
If batteries are planned, inverter compatibility becomes particularly important.
Step 8: Decide Whether You Need Batteries
A solar system does not always require batteries.
A grid-connected system can operate without storage.
However, batteries may be useful if you want:
- Nighttime solar energy
- Backup electricity
- Greater energy independence
- Better solar self-consumption
- Off-grid operation
If you know you will eventually want batteries, consider that when choosing the inverter and system architecture.
Step 9: Choose the Mounting System
Solar panels need a secure mounting structure.
The mounting system depends on the roof type.
Common mounting approaches include systems for:
- Metal roofs
- Tile roofs
- Shingle roofs
- Flat roofs
- Ground-mounted systems
The mounting equipment must be appropriate for the roof and environmental conditions.
Step 10: Install the Mounting Rails
For many roof-mounted systems, installers first secure the appropriate mounting points and rails.
The rails provide the structure to which the solar panels are attached.
Proper alignment is important because the panels should form a stable and organized array.
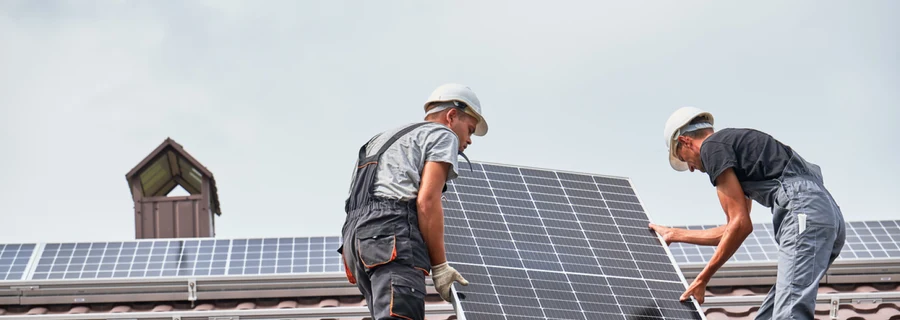
Step 11: Mount the Solar Panels
Once the mounting system is ready, the solar panels can be placed into position.
Installers secure each panel according to the manufacturer’s mounting requirements.
The panels must be firmly attached because they are exposed to:
- Wind
- Rain
- Temperature changes
- Dust
- Other environmental conditions
Step 12: Connect the Solar Panels
The panels are electrically connected into the appropriate configuration.
Depending on the system design, panels may be connected into strings.
The electrical configuration must remain within the inverter’s:
- Voltage limits
- Current limits
- MPPT range
This is an important technical part of the installation.
Step 13: Install Solar Cables
Solar cables carry DC electricity from the panels to the inverter.
The cables should be:
- Correctly sized
- Properly routed
- Protected from damage
- Suitable for outdoor conditions
Poor cable installation can create unnecessary losses and safety problems.
Step 14: Install DC Protection
Solar systems require appropriate electrical protection.
Depending on the system, this may include:
- Disconnect equipment
- Overcurrent protection
- Surge protection
- Grounding and bonding equipment
The exact protection requirements depend on the system architecture and applicable electrical standards.
Step 15: Install the Solar Inverter
The inverter is installed in an appropriate location.
Common locations include:
- Garage
- Utility room
- Equipment room
- Protected exterior wall
The installation area should meet the inverter manufacturer’s requirements for:
- Temperature
- Ventilation
- Clearance
- Moisture
- Accessibility
Step 16: Connect the Inverter to the Home
The inverter’s AC output is connected to the home’s electrical system through appropriate protection and switching equipment.
This allows solar electricity to supply household loads.
The exact connection method depends on the system design and local electrical requirements.
Step 17: Install the Battery
If the system includes battery storage, the battery is installed according to the manufacturer’s requirements.
The installer may need to connect:
- Battery power cables
- Communication cables
- Protection equipment
- Grounding
- Inverter connections
Battery systems require careful attention because they contain substantial stored electrical energy.
Step 18: Install Backup Circuits
If the system is designed for backup power, selected circuits may be connected to a backup distribution system.
For example, essential circuits might include:
- Refrigerator
- Lights
- Internet
- Security
- Fans
- Selected outlets
A whole-home backup system may use a different electrical configuration.
Step 19: Install Monitoring Equipment
Modern solar systems can often be monitored through an application or web platform.
Monitoring may provide information about:
- Solar generation
- Household consumption
- Battery level
- Grid electricity
- System faults
This allows homeowners to identify unusual performance quickly.
Step 20: System Testing
Before the system is placed into normal operation, the installer should perform appropriate testing.
Testing can verify:
- Electrical connections
- Voltage
- Current
- Inverter operation
- Protection systems
- Battery communication
- Monitoring
- Backup functionality
The system should only be commissioned once the installer has confirmed that it operates correctly.
Solar Panel Installation and Weather
Weather can influence installation.
Heavy rain, storms, or dangerous wind conditions can make rooftop work unsafe.
Installers may therefore postpone certain work until conditions improve.
Solar panels themselves can operate in a wide range of weather conditions, but installation safety always takes priority.
How Long Does Solar Installation Take?
Installation time depends on:
- System size
- Roof complexity
- Electrical upgrades
- Battery installation
- Weather
- Accessibility
- Local inspection requirements
A straightforward residential system may be installed relatively quickly, while larger or more complicated systems can require additional time.
Solar Panel Installation Cost
Installation cost varies significantly.
Factors include:
- Number of panels
- Panel type
- Inverter type
- Battery size
- Roof complexity
- Mounting system
- Electrical upgrades
- Labor
- Transportation
- Permitting or inspection requirements
Rather than comparing only the panel price, compare the complete installed system.
What Should a Solar Installation Quote Include?
A detailed quotation should clearly identify:
- Solar panels
- Panel quantity
- Panel specifications
- Inverter
- Battery, if included
- Mounting system
- Wiring
- Protection equipment
- Labor
- Monitoring
- Warranty
- Applicable approvals or inspections
Be cautious when a quote does not clearly explain what is included.
Solar Panel Installation Warranty
Solar equipment can have different types of warranties.
These may include:
Product Warranty
Covers defects in the equipment.
Performance Warranty
Addresses expected panel output over time.
Inverter Warranty
Covers the inverter for the stated warranty period.
Battery Warranty
May specify both years and expected energy throughput or cycle conditions.
Workmanship Warranty
Covers certain installation-related problems.
Understand what each warranty actually covers before signing an agreement.
Common Solar Installation Mistakes
1. Installing Panels on a Poor Roof
A weak or damaged roof can create problems later.
2. Ignoring Shading
Shading can reduce expected solar production.
3. Incorrect Inverter Sizing
An improperly sized inverter can limit system performance.
4. Poor Cable Management
Improperly routed cables can become damaged or create electrical problems.
5. Ignoring Battery Compatibility
Not every battery works with every inverter.
6. Installing Without Considering Future Expansion
If you want more panels or batteries later, the system should be designed with expansion in mind.
7. Choosing Equipment Only Based on Price
The cheapest system may not provide the best long-term value.
Solar Panel Installation Safety
Solar installation involves electrical and rooftop hazards.
Professional installers should use appropriate safety practices when working with:
- Roofs
- Electrical wiring
- DC electricity
- Batteries
- Inverters
Homeowners should not attempt high-voltage electrical work themselves.
Even when the grid is disconnected, solar panels can continue producing electricity when exposed to light.
How to Prepare Your Home for Solar Installation
Before installation, homeowners can:
- Gather recent electricity bills.
- Identify major electrical appliances.
- Check the condition of the roof.
- Trim or assess shading vegetation where appropriate.
- Decide whether battery backup is important.
- Consider future electricity needs.
- Ask installers about warranties.
- Confirm what is included in the quotation.
Good preparation can make the design process much easier.
Solar Installation for a New Home
If you are building a new home, solar can be considered during the design stage.
This may allow you to plan:
- Roof orientation
- Electrical panel location
- Battery location
- Inverter location
- Cable routes
- Equipment space
Planning early can make the final system cleaner and easier to install.
Ground-Mounted Solar Installation
Not every property needs rooftop solar.
Ground-mounted systems can be useful when:
- The roof is unsuitable
- There is plenty of available land
- Roof shading is significant
- The homeowner wants easier access to panels
However, ground-mounted systems require suitable land and appropriate structural support.
Solar Carports
A solar carport combines vehicle parking with solar generation.
Solar panels are mounted above the parking area.
This can be useful when roof space is limited.
A solar carport can potentially provide:
- Solar electricity
- Vehicle shade
- Additional property functionality
Solar Panel Cleaning After Installation
Dust, dirt, leaves, and other debris can accumulate on panels.
The impact depends heavily on local environmental conditions.
In areas with frequent dust or little rainfall, panels may require more attention.
Cleaning should follow safe practices and manufacturer recommendations.
Avoid walking on solar panels.
Solar Panel Maintenance
Solar systems generally require less maintenance than conventional generators.
However, homeowners should monitor:
- Solar production
- Inverter status
- Battery performance
- Error messages
- Visible damage
If production suddenly drops without an obvious weather-related explanation, professional inspection may be appropriate.
How to Know If Your Solar System Is Performing Properly
Monitoring is one of the easiest ways to track performance.
Compare actual production with expected production while considering:
- Weather
- Season
- Shading
- Panel degradation
- System configuration
A temporary drop on a cloudy day may be completely normal.
A persistent unexplained decline deserves further investigation.
Solar Installation and Future Expansion
A homeowner may want to expand the system later.
Potential additions include:
- More solar panels
- Larger inverter
- Additional batteries
- Electric vehicle charging
- Additional backup circuits
Not every system can be expanded indefinitely.
Ask the installer about expansion capacity before installation.
Frequently Asked Questions
Can I install solar panels myself?
Some physical aspects may appear straightforward, but residential solar involves electrical work, rooftop safety, and system commissioning. Professional installation is recommended.
How long do solar panels last?
Solar panels are designed for long-term operation, with manufacturers typically providing long-duration product and performance warranties.
Does solar installation damage the roof?
A properly designed and installed system should account for roof structure, waterproofing, and mounting requirements.
Can solar panels be installed on a metal roof?
Yes. Appropriate mounting systems exist for many types of metal roofs.
Can solar panels be installed on a flat roof?
Yes. Flat-roof systems can use suitable mounting structures designed for the roof and local conditions.
Can I install solar panels without batteries?
Yes. Grid-connected solar systems commonly operate without batteries.
Can solar panels power my house during a blackout?
Not necessarily. A standard grid-tied system normally shuts down during a grid outage. Backup-capable equipment is required for continued operation.
Should I install a battery at the same time as solar panels?
That depends on your energy goals, electricity costs, outage frequency, and budget.
Final Conclusion
A successful solar panel installation is much more than mounting panels on a roof.
It requires careful planning from the initial energy assessment through final commissioning.
The process includes:
Energy assessment → Roof inspection → Solar design → Panel selection → Inverter selection → Mounting → Electrical installation → Battery integration → Testing → Monitoring
Every component needs to work together.
Homeowners should pay particular attention to roof condition, solar exposure, inverter compatibility, battery requirements, electrical protection, warranties, and future energy needs.
Most importantly, solar installation should be carried out according to applicable electrical and safety requirements by appropriately qualified professionals.
When properly designed and installed, a residential solar system can provide clean electricity, reduce dependence on grid power, support battery backup, and deliver value for many years.
The best solar installation is not simply the one with the most panels.
It is the one that is properly sized, safely installed, compatible with the home’s electrical needs, and designed around the homeowner’s long-term energy goals.