 (+035) 527-1710-70
 NEWSLETTER

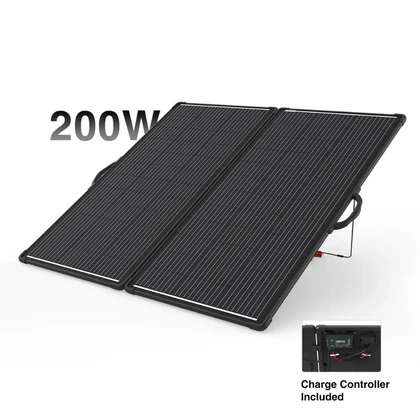
Installing a residential solar energy system is one of the smartest long-term investments a homeowner can make. As electricity costs continue to rise and renewable energy becomes more accessible, home solar installation has become an increasingly popular solution for reducing utility bills while protecting the environment.
Modern solar technology allows homeowners to generate clean, renewable electricity directly from sunlight. Whether you’re interested in lowering monthly expenses, increasing your property’s value, or reducing your carbon footprint, a professionally installed solar system can provide benefits for decades.
However, many homeowners hesitate because they don’t fully understand how the installation process works. Questions about costs, permits, equipment, roof suitability, maintenance, and long-term savings are common.
This comprehensive guide explains everything you need to know about home solar installation. From planning your project and choosing the right equipment to understanding the installation process and maintaining your system, this article will help you make informed decisions every step of the way.
By the end of this guide, you’ll understand exactly what to expect before, during, and after your solar installation.
Table of Contents
- What Is Home Solar Installation?
- Why More Homeowners Are Installing Solar
- How Residential Solar Systems Work
- Components of a Home Solar System
- Preparing Your Home for Solar
- The Step-by-Step Installation Process
- Installation Costs
- Choosing the Right Installer
- Maintenance Tips
- Frequently Asked Questions
- Conclusion
What Is Home Solar Installation?
Home solar installation is the process of designing, installing, and connecting a solar energy system that generates electricity for residential use.
A complete solar installation involves much more than simply placing panels on a roof. It includes evaluating the property, designing the system, obtaining permits, installing electrical components, testing the equipment, and connecting the system to the utility grid where applicable.
The primary objective is to provide homeowners with a reliable source of clean electricity that reduces dependence on traditional utility companies.
A typical residential solar installation includes:
- Solar panels
- Mounting structures
- Solar inverter
- Electrical wiring
- Monitoring system
- Safety disconnects
- Optional battery storage
Together, these components create a system capable of producing electricity for 25 to 30 years or longer.
Why More Homeowners Are Choosing Home Solar Installation
The demand for home solar installation has grown rapidly in recent years, and for good reason.
Lower Electricity Bills
Electricity prices continue to increase in many parts of the world. Installing solar panels for home allows homeowners to generate their own electricity, significantly reducing monthly utility expenses.
Over time, these savings can offset the initial investment and continue providing financial benefits for decades.
Greater Energy Independence
Generating your own electricity reduces dependence on the utility grid.
When combined with battery storage, solar systems can continue supplying electricity during power outages, providing greater peace of mind.
Increased Property Value
Homes equipped with professionally installed solar systems are often more attractive to buyers because they offer lower operating costs and improved energy efficiency.
Many real estate markets recognize solar installations as valuable home upgrades.
Environmental Benefits
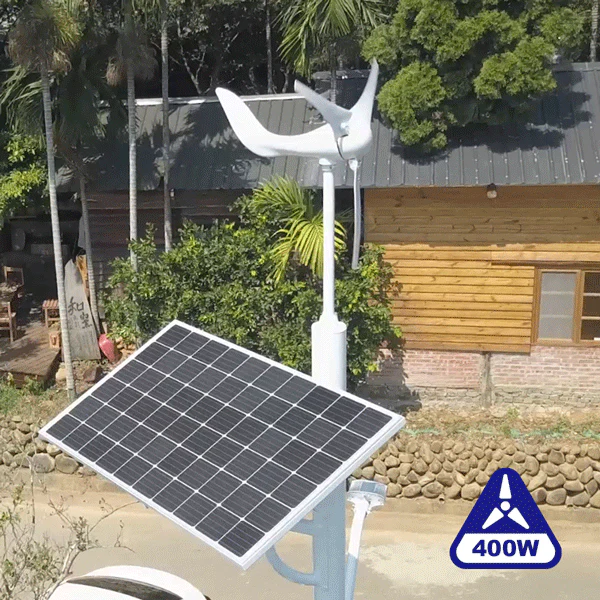
Choosing solar energy for home helps reduce greenhouse gas emissions and dependence on fossil fuels.
By producing clean electricity from sunlight, homeowners contribute to a more sustainable future while reducing their environmental impact.
Minimal Maintenance
Modern solar systems require very little maintenance.
With occasional cleaning and periodic inspections, most systems continue operating efficiently for decades.
How Does a Residential Solar System Work?
Understanding how a residential solar system works helps homeowners appreciate the technology behind home solar installation.
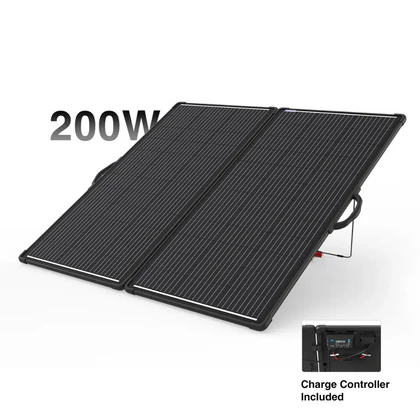
Step 1: Sunlight Reaches the Solar Panels
Solar panels contain photovoltaic (PV) cells that capture sunlight throughout the day.
Step 2: Electricity Is Generated
The photovoltaic cells convert sunlight into direct current (DC) electricity.
Step 3: The Inverter Converts Electricity
Since homes use alternating current (AC), the inverter converts the DC electricity into usable AC electricity.
Step 4: Electricity Powers Your Home
The converted electricity supplies power to household appliances, lighting, heating, cooling systems, and electronic devices.
Step 5: Excess Electricity Is Managed
If your system produces more electricity than your home consumes, the excess energy may:
- Charge a home battery
- Be exported to the utility grid
- Earn energy credits through net metering programs where available
This process maximizes the value of every kilowatt-hour your solar system generates.
Components of a Home Solar Installation
A successful home solar installation depends on several essential components working together efficiently.
Solar Panels
Solar panels are responsible for capturing sunlight and converting it into electricity.
Most residential systems use either monocrystalline or polycrystalline panels.
Solar Inverter
The inverter converts direct current (DC) into alternating current (AC), making the electricity compatible with household appliances.
Without an inverter, the electricity produced by the panels cannot be used in your home.
Mounting System
The mounting system securely attaches the solar panels to your roof or another suitable structure.
Proper installation ensures the panels remain stable under wind, rain, and other weather conditions.
Electrical Wiring
Specialized wiring safely transfers electricity between the panels, inverter, electrical panel, battery system, and utility connection.
Monitoring System
Most modern installations include monitoring software that allows homeowners to track:
- Daily electricity production
- Monthly performance
- Energy savings
- System health
- Equipment alerts
Many systems provide this information through smartphone apps.
Battery Storage (Optional)
Although not required, battery storage allows homeowners to store excess solar energy for nighttime use or during utility outages.
As battery technology continues to improve, more homeowners are choosing to include storage in their installations.
Is Your Home Ready for Solar Installation?
Before beginning a home solar installation, it’s important to evaluate whether your property is a good candidate.
Several factors influence solar performance.
Roof Condition
Your roof should be structurally sound and expected to last many years.
If roof replacement is needed soon, it’s usually best to complete that work before installing solar panels.
Roof Orientation
South-facing roofs generally receive the most sunlight in the Northern Hemisphere, though east- and west-facing roofs can also perform well depending on local conditions.
Roof Space
The amount of available roof area determines how many panels can be installed.
More roof space allows for larger systems and greater electricity production.
Shade
Trees, neighboring buildings, chimneys, and other obstructions can reduce solar energy production.
Professional installers use specialized tools to evaluate shading throughout the year.
Household Electricity Usage
Your average annual electricity consumption helps determine the appropriate system size.
Reviewing utility bills from the previous 12 months provides valuable information during the planning process.
Benefits of Professional Home Solar Installation
While it may be tempting to consider a do-it-yourself approach, professional installation offers significant advantages.
Qualified installers ensure:
- Safe electrical connections
- Proper system sizing
- Compliance with local building codes
- Correct permit applications
- Manufacturer warranty protection
- Maximum energy production
- Long-term system reliability
Choosing an experienced installer reduces the risk of costly mistakes and helps ensure your investment performs as expected for decades.
The Complete Home Solar Installation Process: From Consultation to Power Generation
Once you’ve decided that home solar installation is the right investment for your property, the next step is understanding how the installation process works. Knowing what to expect at each stage helps you prepare your home, avoid unnecessary delays, and ensure your system is installed safely and efficiently.
A professional residential solar installation typically takes a few weeks from the initial consultation to final approval, although the physical installation itself often takes only one to three days.
Below is a detailed look at each step.
Step 1: Schedule a Professional Solar Assessment
Every successful home solar installation begins with a comprehensive site assessment.
During this visit, a certified solar consultant evaluates your property to determine whether it is suitable for solar energy.
The assessment typically includes:
- Measuring your roof dimensions
- Inspecting your roof’s condition
- Evaluating roof orientation
- Identifying areas affected by shade
- Reviewing your electricity bills
- Determining your household’s energy consumption
- Discussing your energy goals
This information allows the installer to design a customized solar system that meets your household’s current and future electricity needs.
Step 2: Design Your Solar Energy System
No two homes are exactly alike, which is why every home solar installation requires a custom system design.
Professional design software helps installers calculate:
- Number of solar panels required
- Expected annual electricity production
- Roof layout
- Panel spacing
- Inverter placement
- Battery location (if included)
- Cable routing
- Safety equipment
The goal is to maximize energy production while ensuring the system meets all local building and electrical regulations.
Modern design software can also estimate how much solar electricity for home your system will generate throughout different seasons of the year.
Step 3: Select the Right Equipment
Choosing quality equipment is essential for maximizing performance and long-term savings.
A residential solar system generally includes several major components.
Solar Panels
The solar panels collect sunlight and convert it into electricity.
Homeowners typically choose between:
Monocrystalline Panels
Advantages include:
- Highest efficiency
- Longer lifespan
- Better performance in limited roof space
- Premium appearance
Polycrystalline Panels
Advantages include:
- Lower purchase price
- Reliable performance
- Excellent value for larger roofs
The best choice depends on your available roof space, budget, and energy goals.
Solar Inverter
The inverter converts the electricity generated by the panels into usable household electricity.
There are several inverter options available:
String Inverters
Ideal for roofs with little or no shading.
Microinverters
Installed beneath each individual panel.
Benefits include:
- Improved performance on partially shaded roofs
- Easier system monitoring
- Better long-term reliability
Power Optimizers
Power optimizers combine features of string inverters and microinverters, helping improve energy production when panels receive varying amounts of sunlight.
Battery Storage
Many homeowners now include battery storage during home solar installation.
Battery systems allow you to:
- Store excess daytime electricity
- Use solar power at night
- Maintain electricity during outages
- Reduce dependence on utility companies
Although optional, batteries increase energy independence and improve the overall value of a solar system.
Step 4: Obtain Permits and Approvals
Before installation begins, several permits and approvals are usually required.
These may include:
- Building permits
- Electrical permits
- Utility company approval
- Environmental compliance (where applicable)
- Homeowners’ association approval (if required)
Professional installers typically handle these applications, helping homeowners avoid administrative complications.
Permit approval timelines vary depending on local regulations.
Step 5: Preparing Your Roof
Before the solar panels are installed, your roof must be ready.
Preparation may include:
- Roof inspection
- Replacing damaged shingles
- Repairing structural issues
- Cleaning installation areas
- Marking mounting locations
If your roof is nearing the end of its lifespan, replacing it before installation is usually the most cost-effective decision.
Since solar panels for home are designed to last 25–30 years, your roof should have a similar expected lifespan.
Step 6: Installing the Mounting System
The mounting system provides the structural foundation for your solar panels.
Professional installers carefully secure mounting brackets to the roof while maintaining waterproof seals to prevent leaks.
A properly installed mounting system ensures:
- Structural stability
- Weather resistance
- Correct panel angle
- Long-term durability
The mounting system is one of the most important components of the entire installation.
Step 7: Installing the Solar Panels
Once the mounting hardware is complete, technicians attach the solar panels.
Each panel is:
- Carefully positioned
- Secured to the mounting rails
- Connected using weather-resistant wiring
- Tested before moving to the next panel
Professional installation ensures optimal spacing and alignment for maximum sunlight exposure.
Step 8: Installing the Electrical Components
After the panels are installed, electricians complete the electrical connections.
This includes:
- Installing the inverter
- Connecting electrical cables
- Installing circuit breakers
- Connecting safety disconnect switches
- Integrating battery storage (if included)
- Connecting the monitoring system
Electrical work must comply with local safety codes and manufacturer specifications.
Step 9: Final Inspection
Before your solar system can begin producing electricity, it must pass a final inspection.
Inspectors verify:
- Electrical safety
- Structural integrity
- Proper grounding
- Equipment installation
- Compliance with building codes
Any issues identified during inspection must be corrected before the system is approved.
Step 10: Utility Connection and System Activation
Once inspections are complete, the utility company authorizes your system to begin operating.
After activation:
- Your panels begin generating electricity.
- Your monitoring system starts recording production.
- Excess electricity may be exported to the grid where net metering is available.
- Your household immediately begins benefiting from solar energy for home.
Congratulations—you are now producing clean, renewable electricity from your own roof.
How Long Does Home Solar Installation Take?
Many homeowners are surprised by how quickly the physical installation is completed.
A typical timeline looks like this:
| Installation Stage | Estimated Time |
|---|---|
| Initial Consultation | 1–2 Days |
| Site Assessment | 1 Day |
| System Design | 3–7 Days |
| Permit Approval | 1–6 Weeks |
| Equipment Delivery | 1–3 Weeks |
| Physical Installation | 1–3 Days |
| Inspection | 1–7 Days |
| Utility Approval | 1–3 Weeks |
Although permitting and utility approvals may extend the overall timeline, the installation itself is usually completed within a few days.
How Much Does Home Solar Installation Cost?
The cost of home solar installation varies depending on several important factors.
These include:
- System size
- Solar panel type
- Roof complexity
- Equipment quality
- Battery storage
- Installation labor
- Local permitting fees
- Government incentives
Rather than focusing only on the upfront cost, homeowners should evaluate the long-term return on investment.
High-quality systems often generate more electricity, require fewer repairs, and deliver greater savings over their lifespan.
Financing Options for Home Solar Installation
Many homeowners choose financing to make solar more affordable.
Common financing options include:
Solar Loans
Solar loans allow homeowners to own their system while making monthly payments.
Advantages include:
- Immediate energy savings
- Ownership of equipment
- Eligibility for many available incentives
- Increased property value
Home Improvement Loans
Some financial institutions offer home improvement loans specifically designed for energy-efficiency projects.
These loans often have competitive interest rates.
Solar Leasing
With a lease, homeowners pay a monthly fee to use the solar system instead of purchasing it outright.
This option typically requires little or no upfront investment but may offer fewer long-term financial benefits than ownership.
Power Purchase Agreements (PPAs)
In a Power Purchase Agreement, a solar provider installs and owns the system while the homeowner agrees to purchase the electricity it generates at a predetermined rate.
PPAs may reduce upfront costs but should be carefully reviewed to understand contract terms and long-term obligations.
Choosing the Best Solar Installation Company
Selecting the right installer is just as important as choosing the right equipment.
When comparing installation companies, consider:
- Years of experience
- Professional certifications
- Customer reviews
- Equipment brands offered
- Warranty coverage
- Installation timeline
- After-sales support
- Maintenance services
- Financing options
- Transparent pricing
Request detailed quotes from multiple providers and compare the total value—not just the lowest price.
A reputable installer will explain your options clearly, answer your questions, and provide realistic expectations about system performance and savings.
Maintaining Your Home Solar System for Maximum Performance
After completing your home solar installation, proper maintenance ensures your system continues producing clean, reliable electricity for decades. One of the biggest advantages of residential solar systems is that they require very little upkeep compared to many other home improvements.
With routine monitoring and occasional inspections, your solar investment can operate efficiently for 25 to 30 years or more.
Keep Your Solar Panels Clean
Solar panels work best when they receive maximum sunlight. Dirt, dust, leaves, pollen, bird droppings, and other debris can reduce their efficiency by blocking sunlight.
Fortunately, in many areas, rainfall naturally washes away most dirt. However, if you live in a dry, dusty, or heavily wooded area, occasional cleaning may improve performance.
When cleaning your panels:
- Use clean water and a soft sponge or cloth.
- Avoid abrasive brushes or harsh chemicals.
- Clean during the early morning or evening when panels are cool.
- Never stand directly on solar panels.
- If your roof is steep or difficult to access, hire a professional cleaning service.
Routine cleaning helps maintain optimal energy production throughout the year.
Monitor Your System’s Performance
Modern home solar installation systems include monitoring software that allows homeowners to track electricity production in real time.
Most systems provide information through a smartphone app or online dashboard, including:
- Daily energy generation
- Weekly production
- Monthly savings
- Annual energy output
- Carbon emissions avoided
- System efficiency
- Equipment status and alerts
Monitoring your system regularly helps identify performance issues early, allowing you to address problems before they affect energy production.
Schedule Professional Inspections
Although solar systems have few moving parts, periodic professional inspections help ensure everything remains in excellent condition.
During an inspection, technicians typically check:
- Panel condition
- Roof mounting hardware
- Electrical wiring
- Inverter operation
- Battery performance (if installed)
- Grounding system
- Weather-related damage
Many experts recommend scheduling an inspection every two to three years or sooner if you notice a significant drop in energy production.
Common Home Solar Installation Mistakes to Avoid
Installing solar panels for home is a significant investment. Avoiding common mistakes can save you money, improve system performance, and extend the life of your installation.
Choosing the Cheapest Quote
While it’s tempting to select the lowest-priced proposal, the cheapest option may not offer the best long-term value.
Lower-cost installations sometimes use:
- Lower-quality panels
- Less efficient inverters
- Shorter warranties
- Less experienced installers
Instead, compare the quality of equipment, installer reputation, warranty coverage, and expected energy production before making your decision.
Installing on an Aging Roof
Solar panels are designed to last 25 to 30 years.
If your roof needs replacement within the next few years, replacing it before home solar installation is usually the more cost-effective option.
Removing and reinstalling solar panels later can increase overall costs.
Ignoring Future Energy Needs
Your household’s electricity usage may increase over time.
Future additions such as:
- Electric vehicles
- Home offices
- Swimming pools
- Heat pumps
- Home additions
can significantly increase electricity demand.
Planning for future energy consumption during the initial system design can prevent costly upgrades later.
Not Understanding Warranty Coverage
Always review warranty details carefully.
Understand:
- What equipment is covered
- Warranty duration
- Performance guarantees
- Installation workmanship coverage
- Service procedures
Comprehensive warranties provide peace of mind and protect your investment.
Hiring Inexperienced Installers
Professional installation directly affects the safety, efficiency, and lifespan of your solar system.
Choose installers who have:
- Industry certifications
- Positive customer reviews
- Proven installation experience
- Transparent pricing
- Strong after-sales support
Working with a reputable company reduces the likelihood of installation errors.
How Much Can You Save with Home Solar Installation?
One of the greatest advantages of home solar installation is the opportunity to reduce household electricity expenses for decades.
Although savings vary depending on location and energy usage, homeowners generally benefit from:
- Lower monthly electricity bills
- Reduced exposure to rising utility rates
- Increased property value
- Lower lifetime energy costs
- Potential government incentives
The longer you own your solar system, the greater the financial benefits become.
Many homeowners recover their initial investment over time through energy savings, after which the electricity produced by the system continues to offset utility costs.
Environmental Benefits of Solar Energy for Home
Switching to solar energy for home benefits not only your finances but also the environment.
Residential solar systems generate electricity without producing greenhouse gas emissions during operation, making them one of the cleanest energy sources available.
Reduced Carbon Footprint
Every kilowatt-hour of electricity generated by solar energy reduces reliance on fossil fuels such as coal, oil, and natural gas.
Over the lifetime of your system, this can significantly lower your household’s carbon emissions.
Cleaner Air
Solar energy helps reduce air pollution by decreasing the demand for electricity generated by fossil-fuel power plants.
Cleaner air contributes to healthier communities and improved public health.
Conserving Natural Resources
Unlike fossil fuels, sunlight is renewable and abundant.
By generating your own electricity, you help conserve finite natural resources and support the transition to sustainable energy.
Future Trends in Home Solar Installation
The residential solar industry continues to evolve with exciting innovations that improve efficiency, affordability, and user experience.
Higher-Efficiency Solar Panels
Manufacturers are developing solar panels capable of generating more electricity from the same roof space, making solar an increasingly practical option for homeowners with smaller roofs.
Smarter Energy Management
Modern systems increasingly integrate with smart home technologies, allowing homeowners to monitor and optimize energy usage automatically.
These systems can coordinate solar production with appliances, heating, cooling, and electric vehicle charging.
Improved Battery Technology
Battery storage continues to improve with:
- Larger storage capacities
- Faster charging speeds
- Longer service life
- Lower costs
As prices continue to decline, battery systems are expected to become standard in many residential installations.
Solar-Powered Electric Vehicle Charging
Many homeowners now install systems capable of charging electric vehicles using clean solar electricity.
This combination reduces both transportation and household energy costs while supporting a more sustainable lifestyle.
Frequently Asked Questions About Home Solar Installation
How long does a home solar installation take?
The physical installation typically takes one to three days. However, the complete process—including design, permitting, inspections, and utility approval—may take several weeks depending on local requirements.
Is home solar installation worth the investment?
For many homeowners, yes. A professionally installed solar system can reduce electricity bills, increase property value, provide long-term savings, and reduce environmental impact.
Can solar panels power my entire home?
Yes. A properly sized solar system can generate enough electricity to meet most or all of a household’s energy needs. Adding battery storage increases energy independence by providing power when the sun isn’t shining.
What happens during a power outage?
Most grid-connected solar systems automatically shut down during a power outage for safety reasons. If you have a battery storage system designed for backup power, it can continue supplying electricity to selected circuits in your home.
Do solar panels work during winter?
Yes. Solar panels generate electricity whenever sunlight is available, including during winter. Snow, shorter days, and cloud cover may reduce production, but cold temperatures can actually improve panel efficiency.
What maintenance does a residential solar system require?
Maintenance is minimal. Keep the panels reasonably clean, monitor system performance, and schedule professional inspections every few years to ensure everything operates efficiently.
Can I install solar panels myself?
While DIY installation kits exist, professional installation is strongly recommended. Certified installers ensure compliance with electrical codes, maintain manufacturer warranties, and optimize system performance.
Final Thoughts
Choosing home solar installation is one of the most effective ways to reduce energy costs, increase your home’s value, and contribute to a cleaner environment. Advances in solar technology have made residential systems more efficient, affordable, and reliable than ever before.
By understanding the installation process, selecting high-quality equipment, working with experienced professionals, and maintaining your system properly, you can enjoy decades of dependable, renewable electricity.
Whether your goal is to lower monthly utility bills, increase energy independence, or support environmental sustainability, investing in solar energy for home is a forward-thinking decision that continues to deliver value year after year.